My local Costco started carrying commercial cookware, so now in addition to dubious non-stick frying pans by the multi-pack I can buy baking pans that are larger than my entire stove.

But those big rimmed baking sheets actually make nice work trays. I often deal with VM-filled fleece by sitting on the couch with a box and a flicker, so this is basically a much larger box. (Put a towel under it, that metal is cold!) I can also see kitchen table fiber painting happening.

This photo was thrown together for demonstration, but that indeed is some filthy Suffolk fleece that will be turned into socks:

sheetpan

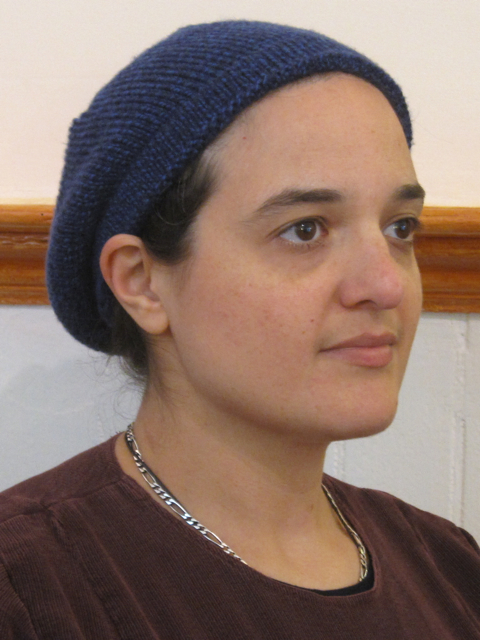
I needed something to keep my hair out of the way, so I tried making a hat with elastic in a hem rather than ribbing. I really like how it works so now I’m making more.

Feorlen wearing the blue hat

I started at the bottom ribbing, as usual, except I made a looser cast-on than normal. This is so I can pick up the loops as stitches later. I could have started with a provisional cast-on and then used live stitches, but this works fine. You can find an example of joining live stitches (and different numbers for each layer) on another hat I made.

Knit a little 1×1 rib, enough to make a casing for your elastic. This will be the inside of the hem and should be a little smaller than the outside layer. Rib stitch is normally smaller than straight knit, so I can use the same number of stitches. Then do a row all purl, to make a turning row for folding the hem under. The purl makes it fold nicely. Continue with regular knit until it is the same length as the ribbing. (No, I didn’t count rows.)

To join the layers together, pick up the cast-on edge the same number of stitches and fold up the hem so the two needles are next to each other. Then slip one stitch from each needle to alternate on the main needle.

The hem ready to fold under:
hat hem with picked-up stitches, ready to join

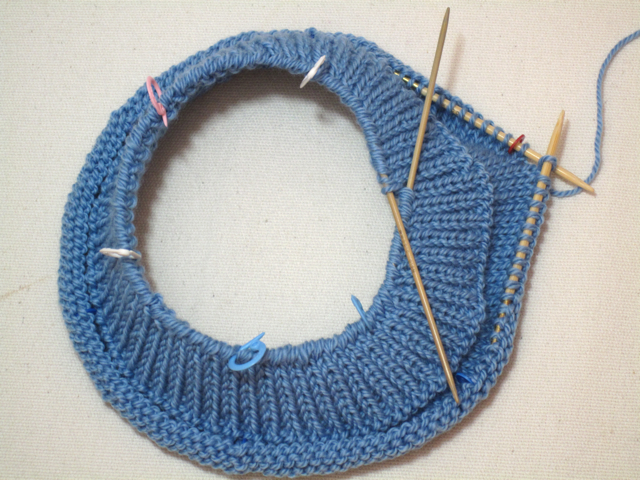
Knit the round, two stitches together each time. The way I knit, K2Tog with the live stitch first and the picked-up loop second works best. You may need to do a different kind of decrease. Leave a few hem stitches on a holder for later so you can insert the elastic.

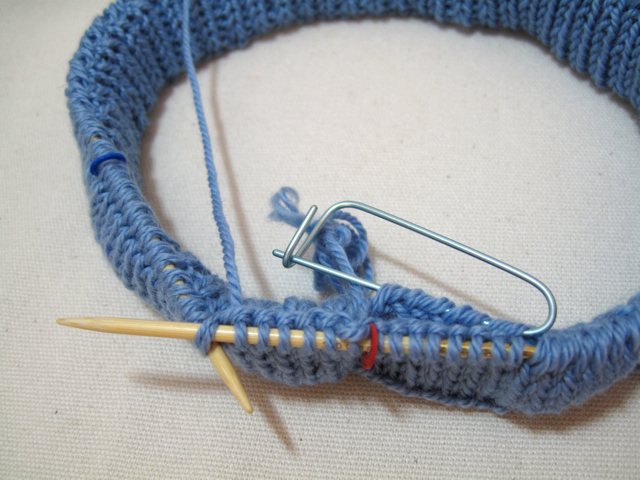
Joining the hem layers:
knitting the joining round

On the next round, check your markers if you have any. Sometimes mine get off a stitch during the K2Tog operation. Complete knitting the hat as usual, with extra height for drape (this leaves space to hold my hair, not a small consideration.)

Insert some flat elastic (I use 3/4 inch non-roll waistband elastic) adjust to fit and fasten down the remaining stitches from the holder.

I used sport-weight yarn and 120 stitches. This is exactly what my gauge swatch told me my head measurement should be, so normally it would be a few too many for a hat. But the elastic makes the band fit right, leaving the rest a little oversized.

I bought a bunch more Moda scrap bags, these are leftovers from making the precut jelly rolls and whatnot. I was able to buy particular designs so I got several of each kind including ones to match the previous purchase.

I spent the evening going through them to see what I’ve got, sort into rational groups and generally play with a pile of fabrics. They are selvedge strips of varying widths, more or less all 32 inches long. Each scrap bag contains (mostly) fabrics from the same line, but occasionally others are mixed in. I have a couple ideas for projects but so far the only thing I’ve done was with some odd strips from an earlier bag. I bought more of the same so I combined them together.

bundles of multicolor strips of fabrics

The designs represented are Birdie, Nature’s Notebook, Secret Garden and Eden.

I had to think about it a while, but now having done a couple of things with pre-cut fabrics for quilting I’m happy with the results. I’m not a huge scrap quilt fan so I don’t need to obsess over how many different designs are in my project. I buy several jelly rolls because I want duplicates, plus the ability to divide the set into multiple projects and still get something decently sized. I don’t see myself doing a complicated original design out of a pre-cut set, but I’m also not doing many of those kinds of quilts.

A matching collection of fabrics is nice for gifts, I don’t have to worry about getting the arrangement just so because it will look good pretty much whatever I do. I think 40 strips in a jelly roll is a little limiting because you have to add a lot of other fabric to get a decent bed quilt, but it’s a minor quibble because I have a closet full of possible choices.

Here is one of my current projects, from Summer Fun. I started with two jelly rolls, two charm packs, a layer cake and some additional yardage. From it I’ll get at least three projects, the first is a bed quilt. Here is the first section of completed blocks:

multicolor quilt

Once I sorted the pieces I wanted to include and cut strips, it was mindlessly simple to sew the blocks together. The worst thing that happened was I accidentally stitched one block with one of the pieces wrong side up. The layer cake and charm packs went together easily into the three block types. Putting together the smaller charm squares was dead simple and the others were only a little more complicated. It’s instant gratification quilting.

There were enough colors that I could arrange the blocks and sashing so no identical fabrics touched, even after setting aside all the reds for sashing squares and binding. I didn’t really plan how many of each type of block, it just worked out with the number of squares I pulled from the packages for my 42 blocks. I made some with 3 triangle because I had an odd number of layer cake squares and couldn’t match them all in pairs. I think it improved the overall design, which was to make as “random” as arrangement as I could devise. (If it were really random, the fabrics and blocks wouldn’t be so evenly distributed.)

I’ve got a couple things underway, both from some precut fabrics I bought. I had two Love is in the Air jelly rolls, I took the brown strips for a small quilt and the rest for a larger one.

With the brown strips, I combined them with two other pink and brown fabrics and made rail fence blocks in a pinwheel arrangement. There are six different fabrics in my brown strips, so I’ll have six slightly different types of blocks.

pink and brown rail fence quilt blocks

From the remaining pink, white and green strips I added some additional pink fabric and I’m working on a log cabin and star design. When I’m done I’ll have directions to post but I want to make sure they actually worked first. It’s fairly complicated and I tried to cut the strips as efficiently as possible, which was a challenge.

pink log cabin and stars quilt blocks